Video to Video AI: How It Works and How to Use It
ImagesArt.ai
11/5/2026
Video to video AI takes footage that already exists and generates a new version of it, keeping the timing and general motion while changing the look, setting, subject or style, guided by a prompt and optional reference images. You've probably already felt why that matters. You have a phone clip that captures the right movement, but the room is wrong, the light is flat, or the style doesn't match the post you need to publish today.
Reshooting isn't always an option, and starting from words alone often gives you motion you didn't ask for. A better way to work is to treat each generation as a shot you can diagnose and budget, not as a lucky draw. Change one thing, check what broke, log what it cost, and keep only the take that survives playback.
Table of Contents
- What Video to Video AI Means in Plain Terms
- The Three Inputs That Steer Every Result
- Specs and Examples for Reels, Ads and Product Demos
- How to Run a Video to Video Workflow Step by Step
- Keeping Characters and Products Consistent Across Shots
- What a Usable Clip Really Costs and How to Track It
- Run Your First Video to Video Test This Week
What Video to Video AI Means in Plain Terms
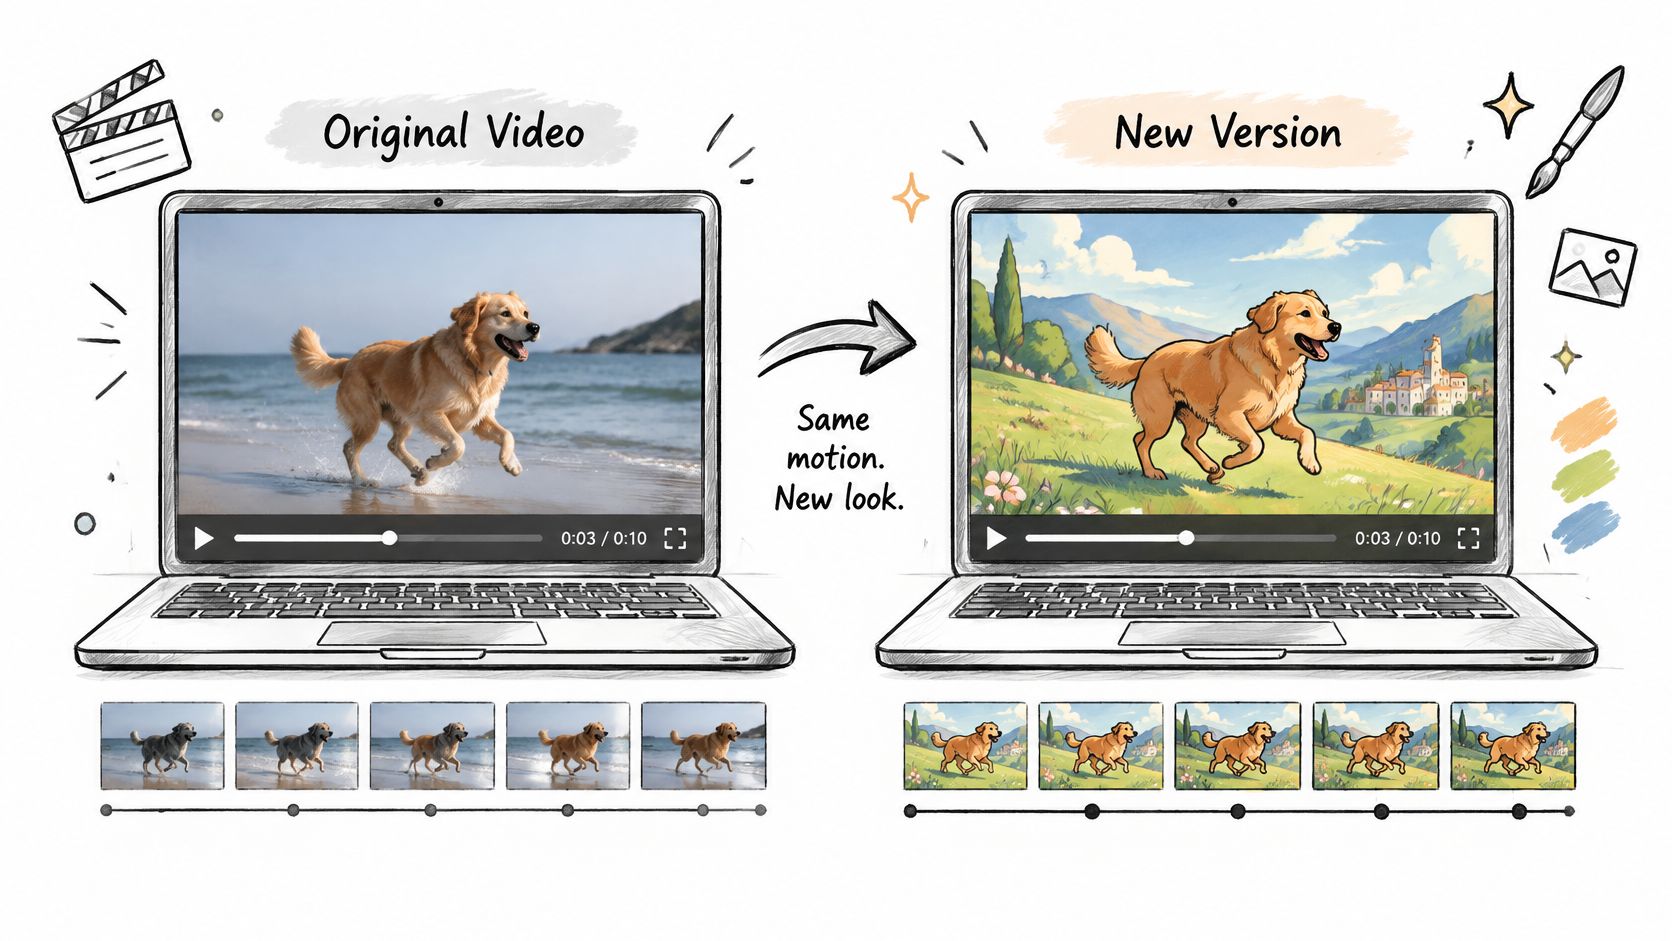
Say you filmed a 10 second phone clip of someone pouring coffee. The hand lifts, the stream hits the cup, and the camera pushes in slowly. You like the timing, but you want it as a hand drawn animation in a bright cafe instead of a dim kitchen.
That's the job in one sentence. Video to video AI takes footage that already exists and generates a new version of it, keeping the timing and general motion while changing the look, setting, subject or style.
Think of a film set that keeps the performance. The actor does the same moves, the camera follows the same path, but the crew rebuilds the costumes, lighting and backdrop around them. You're not asking for a new performance. You're asking for a new version of the one you already captured.
How It Differs From Nearby Tools
Text to video invents motion from words alone, so you control the idea but not the exact choreography. Image to video starts from one still photo and animates it, so the first frame is fixed but the movement is largely invented. If you're sorting these options, a plain overview of different AI model types and what they do helps you match the tool to the starting asset you have.
Video to video gives you a trade off. The source clip sets the choreography, so you gain control over timing and camera path. You also inherit its flaws, including shake, hard cuts and awkward frames, because the model reads those as part of the performance.
Two Tests Every Restyle Must Pass
Early work on visual speech synthesis, described in a 2019 study using the LRW dataset of 500 distinct words, treated translation as more than editing frames one by one. The new clip had to keep the same spoken content while looking coherent across the whole sequence. That left two lasting requirements.
- Same action: The pour, dance step or product turn still reads clearly after the style change.
- Coherent frames: Details don't flicker, melt or jump from one frame to the next.
Judge a restyled clip by whether its motion holds during playback, not by one attractive frame you paused on.
Before you start, run three quick checks. First, must the motion stay identical to a real performance? Second, do you already have footage worth keeping? Third, how far can the look change before viewers stop recognizing the original scene? If you answered yes, yes, and quite far, you're in the right territory.
The Three Inputs That Steer Every Result
The source sets the choreography. Everything else decorates, redirects or replaces parts of that choreography. When a result disappoints, most creators rewrite the prompt first, but that order is backwards.
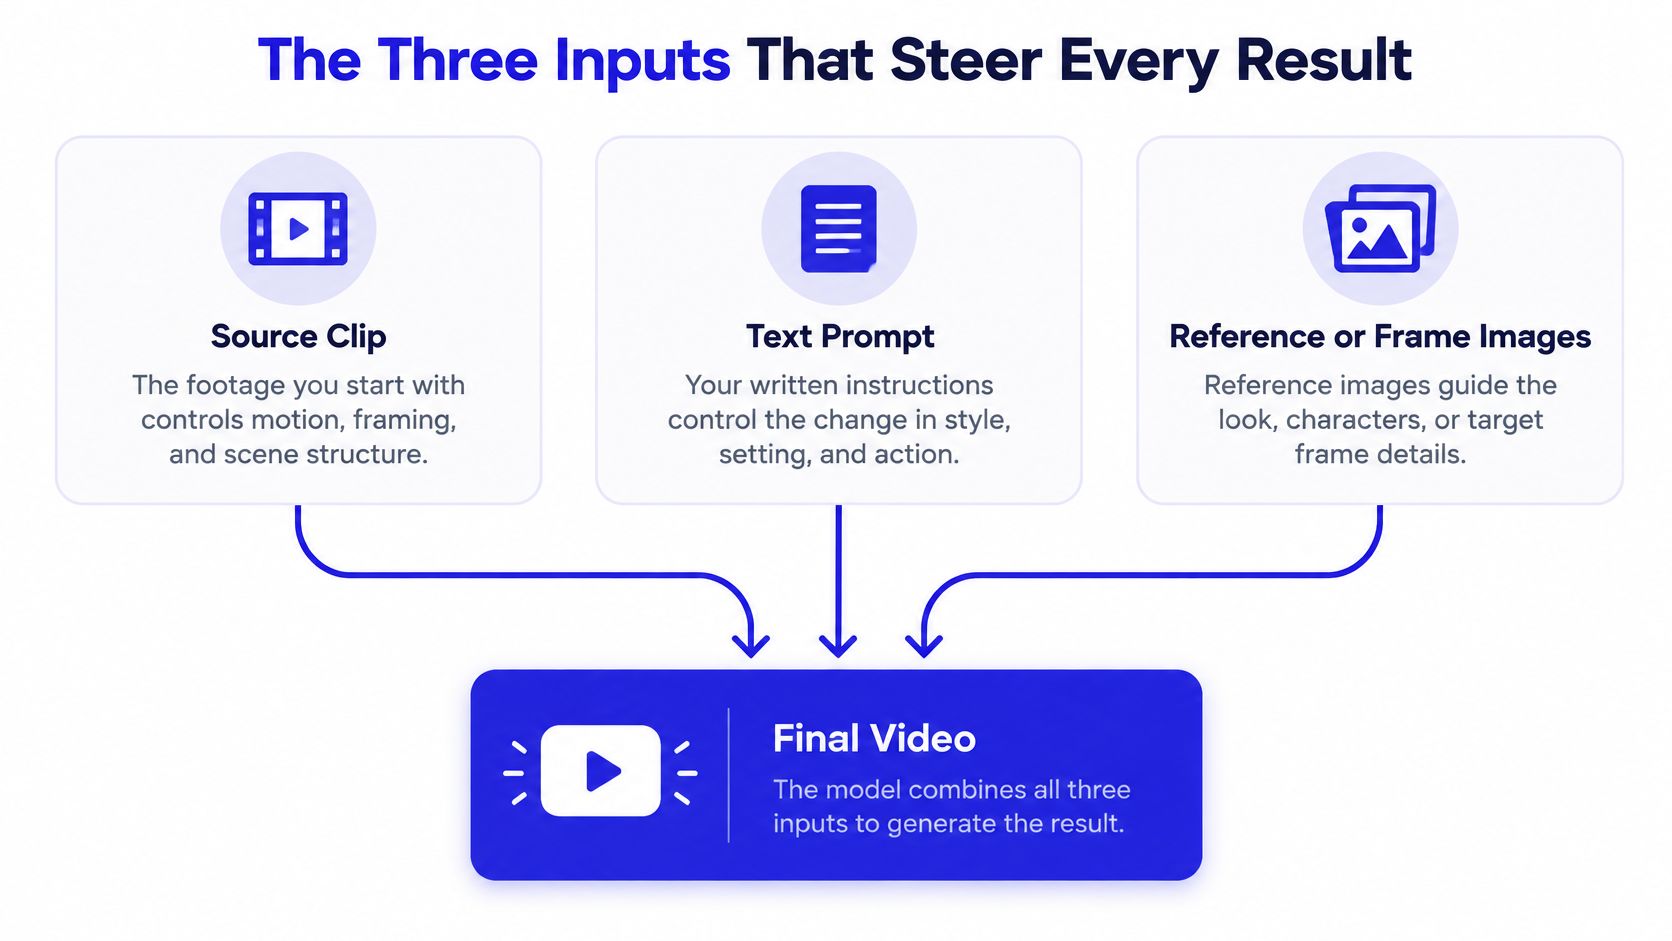
You steer every output with three inputs. The source clip controls timing, framing and where the subject moves. The text prompt controls the new look, setting, mood and lighting. Reference or frame images pin down who or what appears, and in start and end frame work, how a transition opens and closes.
Why Layering Beats Length
Each input narrows the result further. A clean source with a short, specific prompt usually beats a long prompt laid over a messy clip, because the model doesn't have to guess which instruction matters most. A useful prompt names one style, one setting and one lighting note, for example, "watercolor illustration, sunny cafe terrace, soft morning light, same pour and same slow push in."
Conflict is the common failure. Write "dark moody night, bright and cheerful, static camera, fast orbit" and the model averages the contradictions into something muddy. It isn't ignoring you. It's trying to satisfy instructions that cancel each other.
If you're building prompts for Veo style models, a structured prompt generator for video scenes can help you keep those elements separated instead of piling adjectives into one line. Use it to draft, then cut anything you can't see in the frame.
Practical rule: Fix the source before the prompt, and the prompt before the references. That order saves you from polishing words for footage that was never going to work.
Inputs, Roles and Fixes
| Input | What it controls | Common failure | Quick fix |
|---|---|---|---|
| Source footage | Timing, camera path, subject position | Shake and cuts carry into the output | Trim to one steady segment and remove cuts |
| Text prompt | Look, setting, mood, lighting | Conflicting adjectives cancel each other | Keep one style, one setting and one lighting note |
| Reference images | Character, product, outfit, place | Too many references compete | Use the fewest images that define the subject |
| Start and end frames | Opening and closing state of a transition | Frames too different for a smooth morph | Match angle and framing before generating |
| Duration and resolution | Length of motion and level of detail | Long clips drift off model | Generate short shots, then upscale the chosen take |
Read the table as a diagnosis order. If the camera lurches, don't add references. If the subject is wrong but motion is right, don't reshoot the source. Change the layer that owns the problem, then rerun and compare.
Specs and Examples for Reels, Ads and Product Demos
A Reels creator restyles a dance clip into a rooftop at sunset. She keeps the same beats, delivers it vertical, and cuts a test take to 9 to 15 seconds so the loop lands quickly. The performance carries the post, and the new setting gives people a reason to replay it.
An e-commerce team works differently. They animate a product photo into three beats: problem, product action and result, keeping the package centered where interface buttons will not cover it. A small brand can go longer when the offer needs proof, storyboarding a 21 to 34 second ad with a fast hook, a use case, a short demonstration and a final offer. If you are deciding how much of the paid mix should be video, background on video ad prevalence for paid social helps set expectations before you commit formats.
Treat those two lengths as planning ranges, not platform rules. TikTok's published in-feed specifications list 9:16 vertical video at a minimum of 540x960 pixels, horizontal and square minimums of 960x540 and 640x640 pixels, and a general non-Spark ad range of 5 to 60 seconds with files up to 500 MB. Build the test inside that envelope, then log which length earned a usable take.
| Placement | Aspect ratio | Minimum or export size | Length to plan |
|---|---|---|---|
| Vertical in-feed, Reels and TikTok | 9:16 | 540x960 minimum; 1080x1920 export | Test 9 to 15 seconds; keep uploads within 5 to 60 |
| Horizontal in-feed | 16:9 | 960x540 minimum | Keep uploads within 5 to 60 seconds |
| Square feed | 1:1 | 640x640 minimum | Keep uploads within 5 to 60 seconds |
| Small-business vertical ad | 9:16 | 1080x1920 export | Plan 21 to 34 seconds when the offer needs a demo |
Generate a 9:16 master first rather than cropping later, since stretched or compressed frames are discouraged. Export at 1080x1920 so an editor has room to trim handles. Make separate short variants instead of forcing one edit into every placement, and record each render like a shot: source, prompt, ratio, duration and whether the clip was usable.
How to Run a Video to Video Workflow Step by Step
Speed has changed how practical this process feels. The 2024 StreamV2V research system reported streaming video-to-video translation at 20 frames per second on a single NVIDIA A100 GPU, described as 15 times faster than FlowVid and 158 times faster than TokenFlow. You won't get that exact setup on every platform, but the direction matters. Faster previews mean you can test a change while you still remember why you made it.
Use that speed for disciplined iteration, not random rerolls.
Prepare the Shot Before You Generate
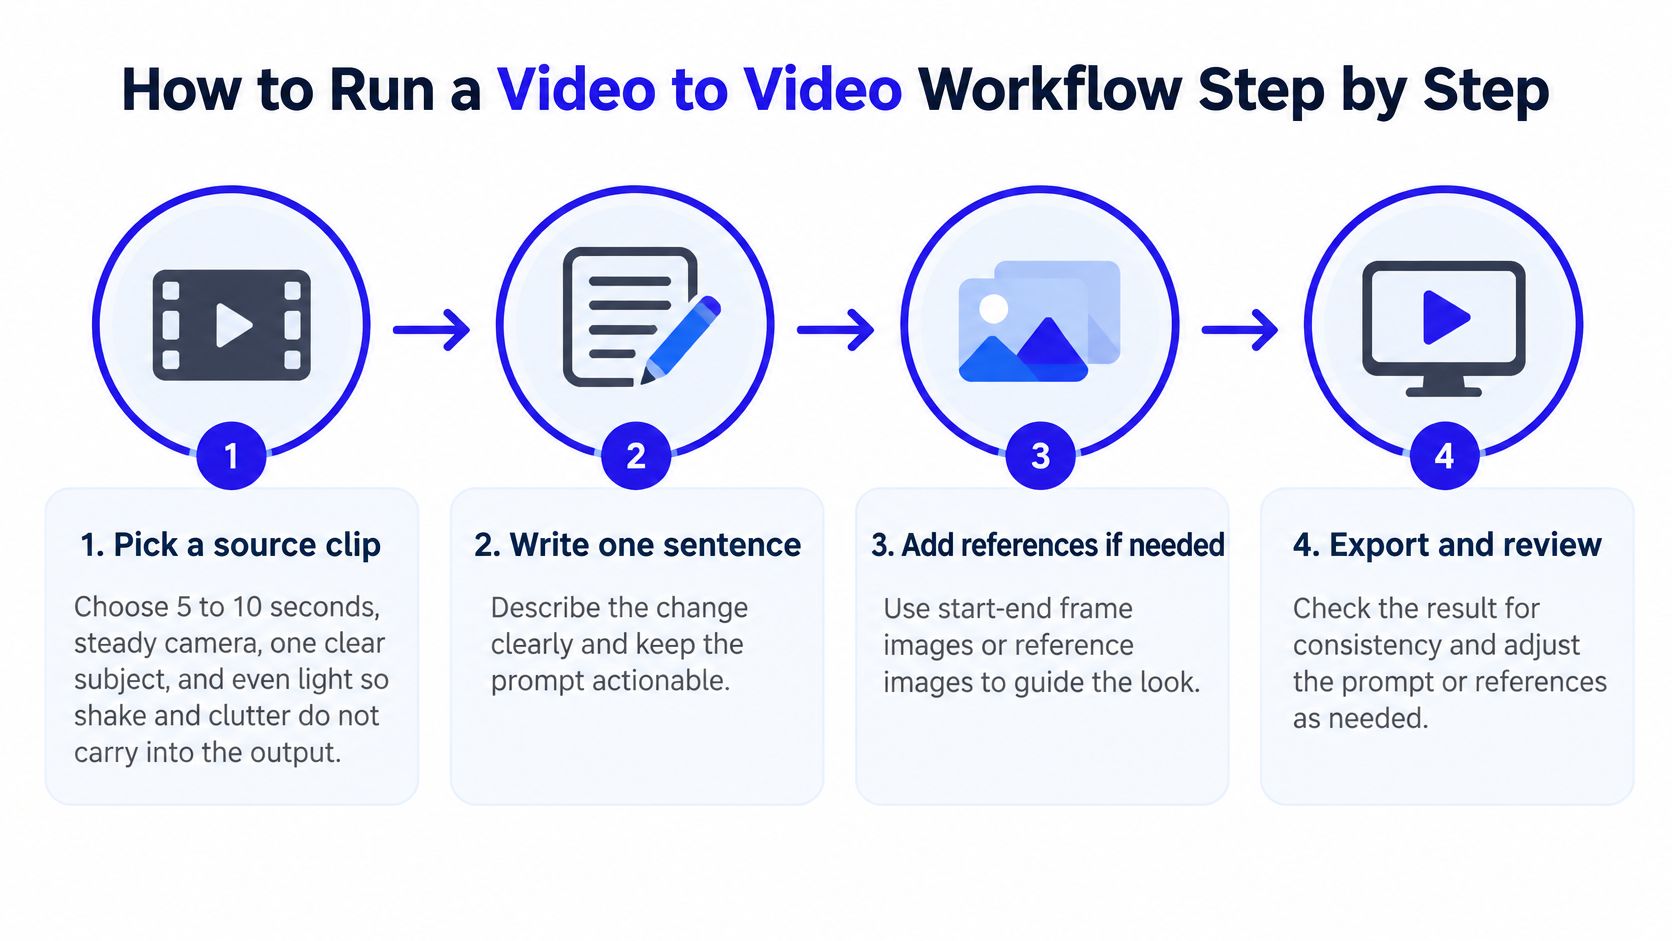
- Pick a source clip of 5 to 10 seconds. Choose a steady camera, one clear subject and even light. Shake and clutter carry straight into the output, so a boring but clean clip beats an exciting messy one.
- Write the change as one sentence. Name what must stay, such as motion, timing and camera path, and what changes, such as style, setting or subject. Try, "keep the same pour and slow push in, change the kitchen to a sunny cafe in watercolor style."
- Choose the mode that fits the goal. Use Text to Video for a concept with no footage, Image to Video for a single still, or Start-End Frame for a controlled transition between two states. Picking the wrong mode forces the prompt to do work the input should do.
- Generate a low resolution draft first. You're testing direction, not detail. A draft tells you in seconds whether the motion survives and the new look reads at phone size.
Watch one complete run of the workflow before you judge your own first draft, so you can separate normal iteration from a real setup mistake.
Check, Change One Thing, Then Finish
- Check the first and last second closely. Look for identity drift, hands, product edges and any on-screen text. Most failures announce themselves at the ends, where the model has the least nearby information to copy.
- Change one variable per attempt. Adjust the prompt, the reference set or the duration, but not all three. If you change everything, a better result teaches you nothing you can repeat.
- Re-run only the chosen take at final resolution. Upscaling every draft wastes credits on shots you'll delete. Spend detail money on the winner.
- Export at the target aspect ratio and check sound. Confirm audio is clear and captions sit inside safe areas. If speech drifts from the picture after export, work through sync troubleshooting for UGC creators before you regenerate a clip that may only need an edit fix.
One variable per attempt feels slow for the first three tries and much faster by the tenth, because you stop guessing.
Save the input files, prompt and settings with each export. That small habit turns a good accident into a shot you can reproduce next week when a client asks for the same look in a new size.
Keeping Characters and Products Consistent Across Shots
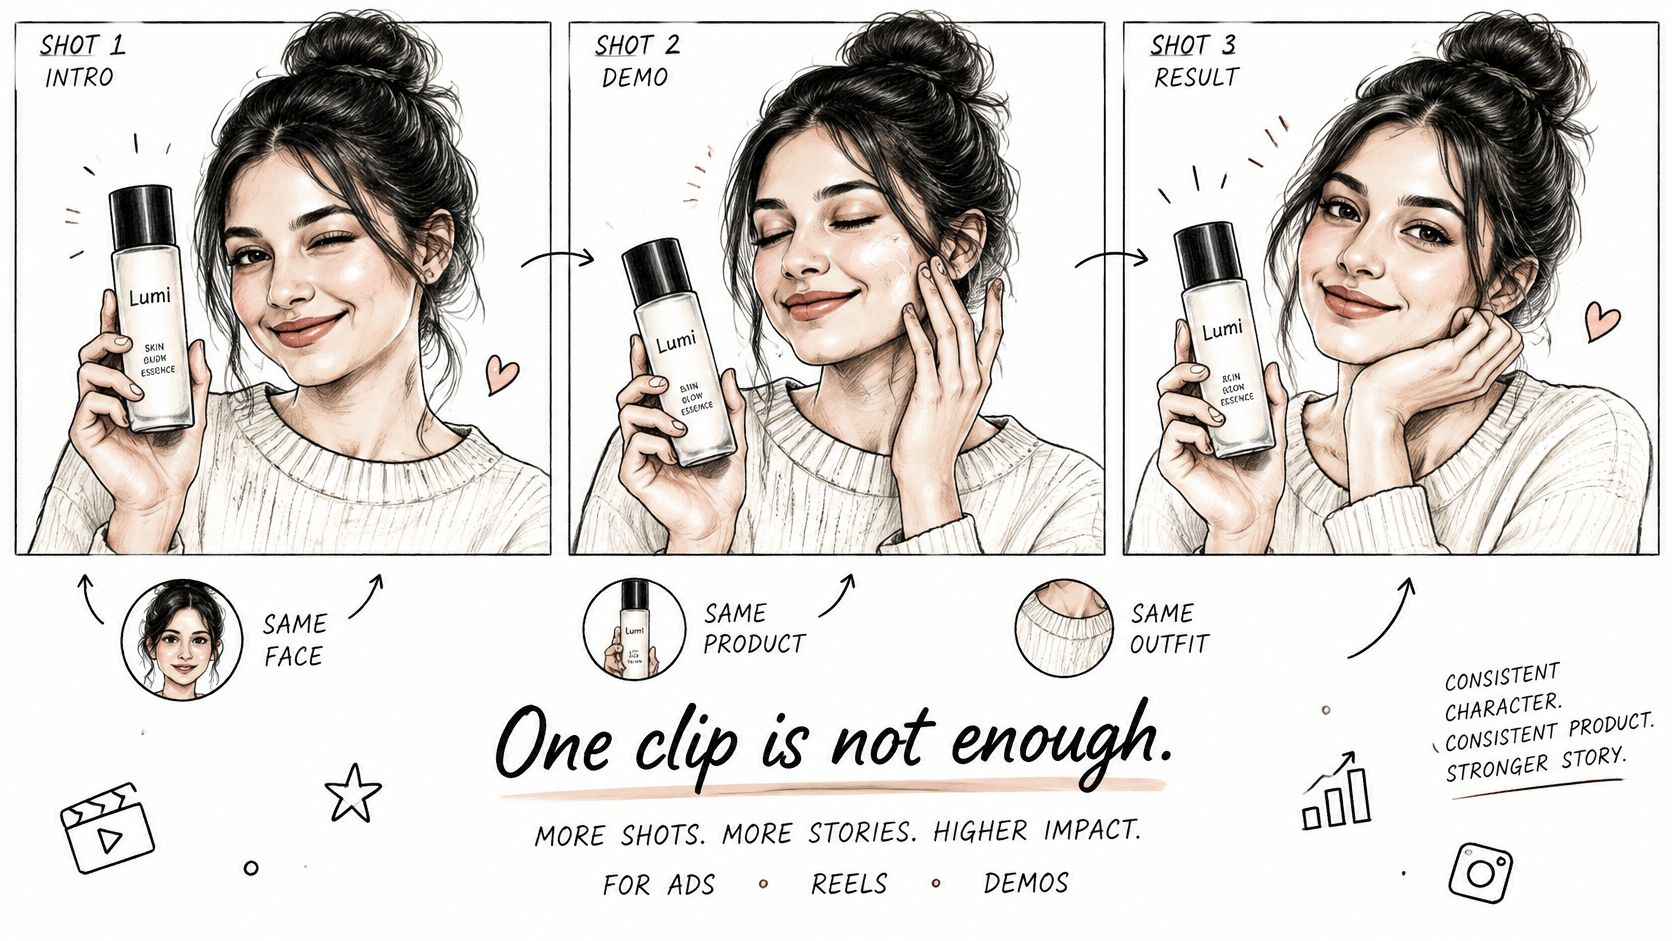
More references don't automatically help. That's the uncomfortable starting point. Each extra image can add a competing face angle, outfit or lighting setup, and the model averages them into a person who looks almost right in every shot and exactly right in none.
One good clip also isn't a campaign. A face, product or outfit has to stay the same across several shots, and creators feel that gap. A 2025 survey of generative film research reports that artists ranked consistent character movement as the highest priority improvement, followed by camera control and overall character consistency.
Three Tactics That Repeat Well
Start from clean, evenly lit product or portrait photos, because shadows baked into a reference become features the model preserves. Limit motion to one simple move, such as a slow push in, so labels and proportions have less chance to warp. Generate short shots of about five seconds and join them in editing instead of asking for one long take.
When a shot fails, ask one diagnosis question before you rerun anything. Did the problem start in the source image, the prompt, the reference set, the motion instruction, the resolution or the model? Answering that narrows your next change to one layer.
| Symptom | Likely cause | Fix |
|---|---|---|
| Face drifts between shots | Mixed or weak reference images | Use one clean front-facing source and fewer references |
| Product label warps | Large motion across the package | Limit motion to a slow push-in or gentle rotation |
| Camera move ignored | Motion and camera instructions compete | State one camera move per clip |
| Wardrobe changes mid-clip | Clip runs too long | Generate five-second shots and join them |
| Colors shift between cuts | Each shot re-lights differently | Repeat the same lighting phrase in every prompt |
Try a small test before a full campaign. Make three shots of the same product, reuse the same reference set and keep the lighting phrase identical in every prompt. Put them side by side on a phone sized screen and check proportions, label shape and color. If shot two already drifts, fix that cause now. Scaling a drifting setup only produces more versions of the same problem.
What a Usable Clip Really Costs and How to Track It
A usable clip rarely costs the price of one generation. It costs every attempt you needed to reach it, plus the finishing work nobody puts in the headline price. That's not a reason to avoid the tools. It's a reason to track cost per usable clip instead of cost per click.
Published API comparisons show prices of roughly $0.05 to $0.40 per generated second, meaning a ten-second clip can cost about $0.50 to $4 before editing and five attempts can raise that range to approximately $2.50 to $20. Reruns, upscaling, audio, human review and version control sit on top of those figures.
| Scenario | Attempts | Estimated spend |
|---|---|---|
| One 10-second clip, first attempt | 1 | $0.50 to $4 |
| One 10-second clip, five attempts | 5 | $2.50 to $20 |
| One 15-second clip, five attempts | 5 | $3.75 to $30 |
| Three 15-second shots, five attempts each | 15 | $11.25 to $90 |
Budget by Goal, Not by Hope
Split your credits by stage. Use many cheap drafts for concept exploration, a few variants for social testing, a fixed number of revisions for client approval, and one upscaled take for final delivery. If you want to compare how credit systems shape that math, this breakdown of AI pricing models and credit structures helps you read a plan before you spend against it.
Keep records with the same care. Provenance metadata, watermarking and fingerprinting are distinct authentication methods, and provenance can be lost when files are re-encoded or screenshotted. Retain your original inputs and prompts in a simple log, export a provenance record where you can, and label AI assisted material where required.
Get written permission for faces, products and source footage before you generate. That paperwork reduces client disputes later, when nobody remembers who approved what. Your log only needs five fields to be useful, source, prompt, mode, duration and spend. Fill it in while the render runs and it'll take seconds.
Run Your First Video to Video Test This Week
Pick one short project and run a controlled test before you commit budget to a campaign. Choose a single 5 to 10 second source clip with a steady camera. Write one sentence stating what stays, motion, timing and camera path, and what changes, style, setting or subject.
Generate a low cost draft in the mode that fits, Text to Video, Image to Video or Start-End Frame, with videos between 1 and 15 seconds depending on the model. Judge it on its first and last second before you pay for a final version. Treat the test like any other experiment, and if you want a structure for that mindset, read how teams take experiments from hypothesis to rollout and borrow the discipline of changing one variable at a time.
You can run that test on ImagesArt AI, which offers those generation modes plus Reference inputs for up to 7 images to help keep a subject consistent, and eligible new accounts may receive 15 free credits for an early draft and check cycle. Log every attempt with source, prompt, mode, duration and cost per usable clip. One honest log from a small test will tell you more about your workflow than ten generations you didn't track.
Start with that one clip this week, run your draft and check cycle, and compare takes side by side before you upscale anything. ImagesArt AI gives you Text to Video, Image to Video, Start-End Frame and Reference modes in one place with multi-model access, so you can test the same idea a few ways and keep the version that holds up. Bring a clean source, a one sentence prompt and your log, and publish the take you can reproduce.