How to Extend Image AI for Reels and Product Ads
ImagesArt.ai
11/21/2026
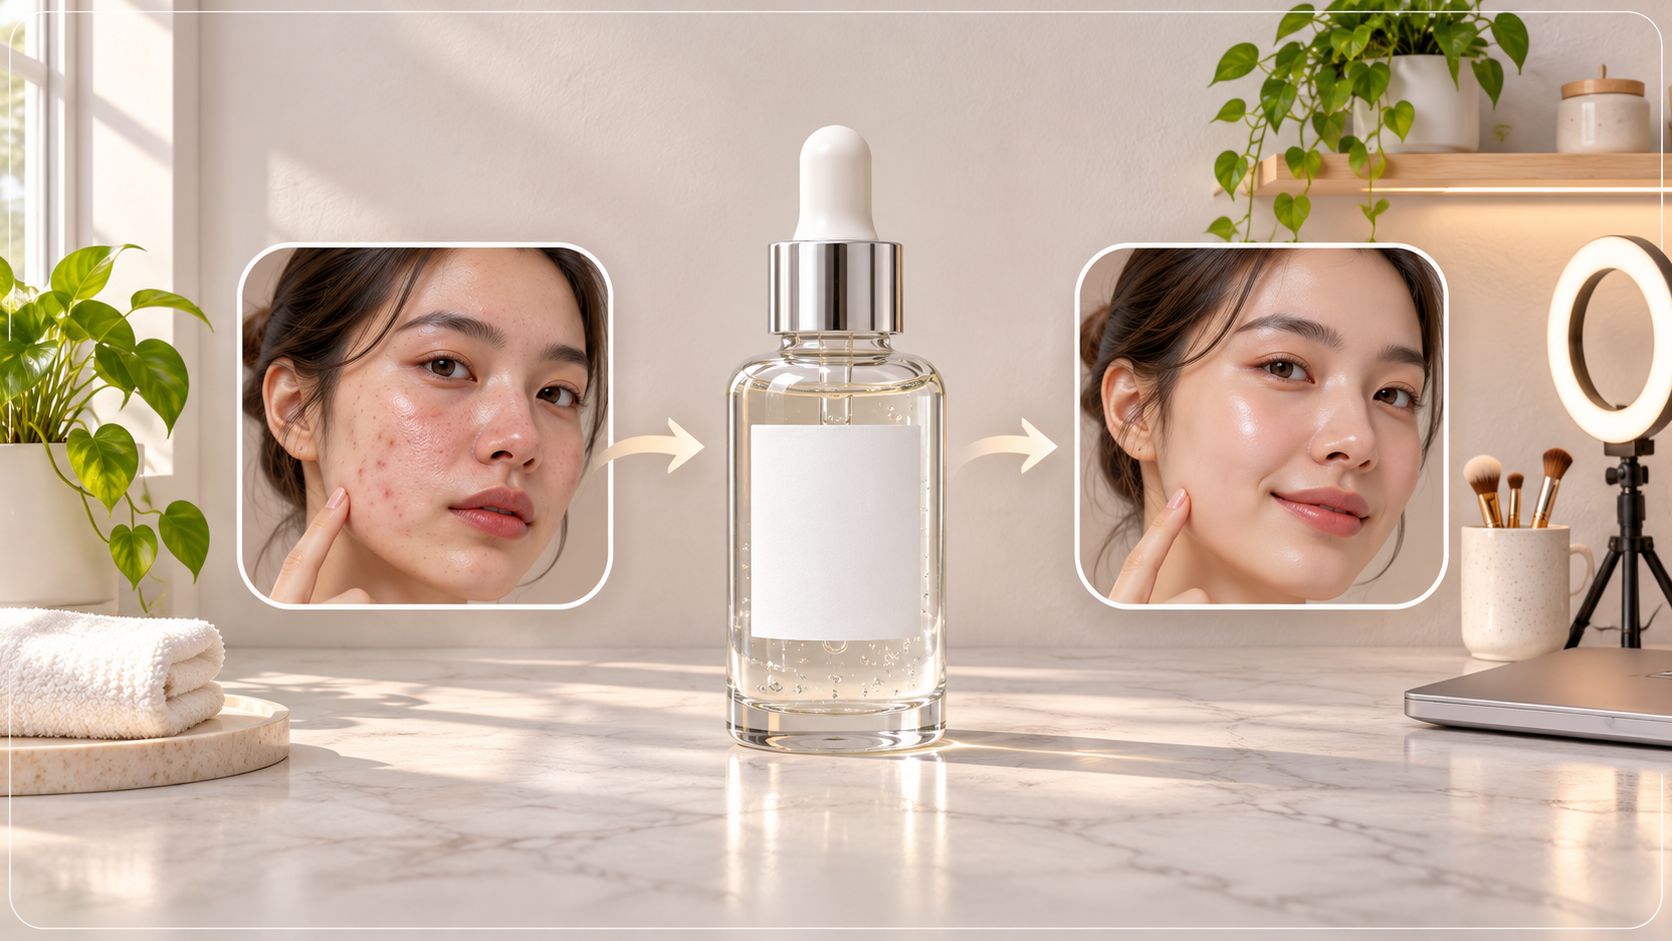
The usual advice for AI image extension is to expand the canvas, write a prompt, and keep the most realistic result. That's the wrong acceptance test for a product ad. A convincing new bathroom, countertop, or studio can still misrepresent what you're selling, even when the bottle in the middle looks untouched.
Lock the subject, then accept or reject the new pixels. Treat the extension as a publishing decision, not just an aesthetic upgrade. That approach gives creators and small marketing teams a usable frame without changing the offer.
Table of Contents
- What Extend Image AI Actually Does
- Canvas Sizes for Reels and Short Ads
- How to Extend the Image in Stages
- Fix Seams Scale and Broken Perspective
- Check the Product Before You Publish
- Publish the Still then Test the Clip
What Extend Image AI Actually Does
AI image extension, often called outpainting, generates content beyond a photograph's existing borders. It doesn't stretch the subject, and it isn't the same as enlarging the file. Resizing changes dimensions; outpainting proposes what might exist outside the camera's view.
In an extend image AI workflow, you choose the destination shape, enlarge the canvas, and mark the empty area for generation. The existing photograph supplies context for the added floor, wall, sky, or texture. Your job is to decide which parts are evidence and which parts the tool is allowed to invent.
Decide what kind of image you're making
A decorative artwork crop and an e-commerce packshot need different acceptance standards. An illustrator might welcome an invented cloud formation around an existing painting. A retailer shouldn't welcome a generated countertop that makes a travel-size bottle appear full-size.
Start by naming the job:
- Decorative expansion: Add breathing room around artwork, a portrait, or a social graphic without changing the subject's meaning.
- Commercial adaptation: Fit a real product photograph into an ad layout while preserving the item buyers will receive.
- Motion preparation: Create space for a camera move, an overlay, or a product reveal before animating the still.
Those jobs can share a canvas, but they don't share unlimited creative permission. For a product demo, the background must support the item rather than imply unsupported durability, capacity, ingredients, or performance.
A generated setting is still part of the advertisement. Keeping the original product pixels doesn't automatically keep the message truthful.
Extend only when cropping isn't enough
Try a conventional crop first. If it removes nothing important and leaves room for the message, generation adds unnecessary review work.
Use extension when the crop would cut off the subject, crowd the composition, or leave no usable space for the intended layout. A taller background can help a packshot fit a vertical ad; a wider environment can accommodate a headline. The useful result is the same subject in a workable composition, not a more elaborate scene.
Canvas Sizes for Reels and Short Ads
Pick a placement before opening a generator. Use the chart to choose the canvas, then budget space for captions, interface overlays, and the product itself. Don't generate a polished composition and discover afterward that the placement crops its label.
Target frames for extended stills and short video
| Placement | Aspect ratio | Pixel limit | Duration or file rule |
|---|---|---|---|
| Instagram Reels | 9:16 | Horizontal side at most 1,920 px | 3 seconds to 15 minutes; MP4 or MOV; H.264 or HEVC; 23–60 fps; maximum 25 Mbps; maximum 300 MB |
| TikTok app-bundle vertical | 9:16 | At least 720 × 1,280 px | 5–60 seconds; 21–30 seconds recommended |
| TikTok app-bundle horizontal | 16:9 | At least 1,280 × 720 px | 5–60 seconds; export separately, don't crop the vertical |
| TikTok app-bundle square | 1:1 | At least 640 × 640 px | 5–60 seconds; keep the product centered |
| TikTok TopView | 9:16 | At least 540 × 960 px | 5–60 seconds; 9–15 seconds recommended; 360p is too small |
The Instagram row follows the Instagram publishing API specifications, including Meta's recommended 9:16 ratio and the listed duration, codec, frame-rate, bitrate, and file-size limits. The app-bundle rows follow TikTok's global app-bundle video specifications, which accept vertical, horizontal, and square formats and recommend 21–30 seconds. The TikTok TopView specifications require at least 540 × 960 pixels and recommend 9–15 seconds, so a 360p export won't meet that placement's minimum.
These are delivery constraints, not instructions to fill the maximum duration. A product reveal with a clear action may need much less time than an explanation-led demonstration. Plan the message before paying to generate extra motion.
Build the composition for its destination
Place the subject deliberately within the new canvas. A centered packshot can work for a straightforward demo, while an offset product may leave better space for an offer or caption. Keep packaging text away from the outer edges and check the actual placement preview rather than assuming the entire frame stays unobstructed.
Use this preparation sequence:
- Choose the delivery row. Identify whether you're making a Reel, an app-bundle ad, or a placement-specific cut.
- Place the existing photo. Move it within the canvas without stretching the product.
- Reserve message space. Plan where headlines, subtitles, and branding will sit before generating background detail.
- Create separate compositions. Reposition the source for horizontal delivery instead of automatically cropping the finished vertical ad.
If the campaign also includes television, consult Adwave's TV ad dimension requirements as a separate delivery resource. Don't assume a social export is ready for another distribution channel.
Use this video alongside your canvas setup and export planning:
Keep the working still at a useful editing resolution. A small preview can help you judge composition, but it can't tell you whether fine packaging text will survive the final export.
How to Extend the Image in Stages
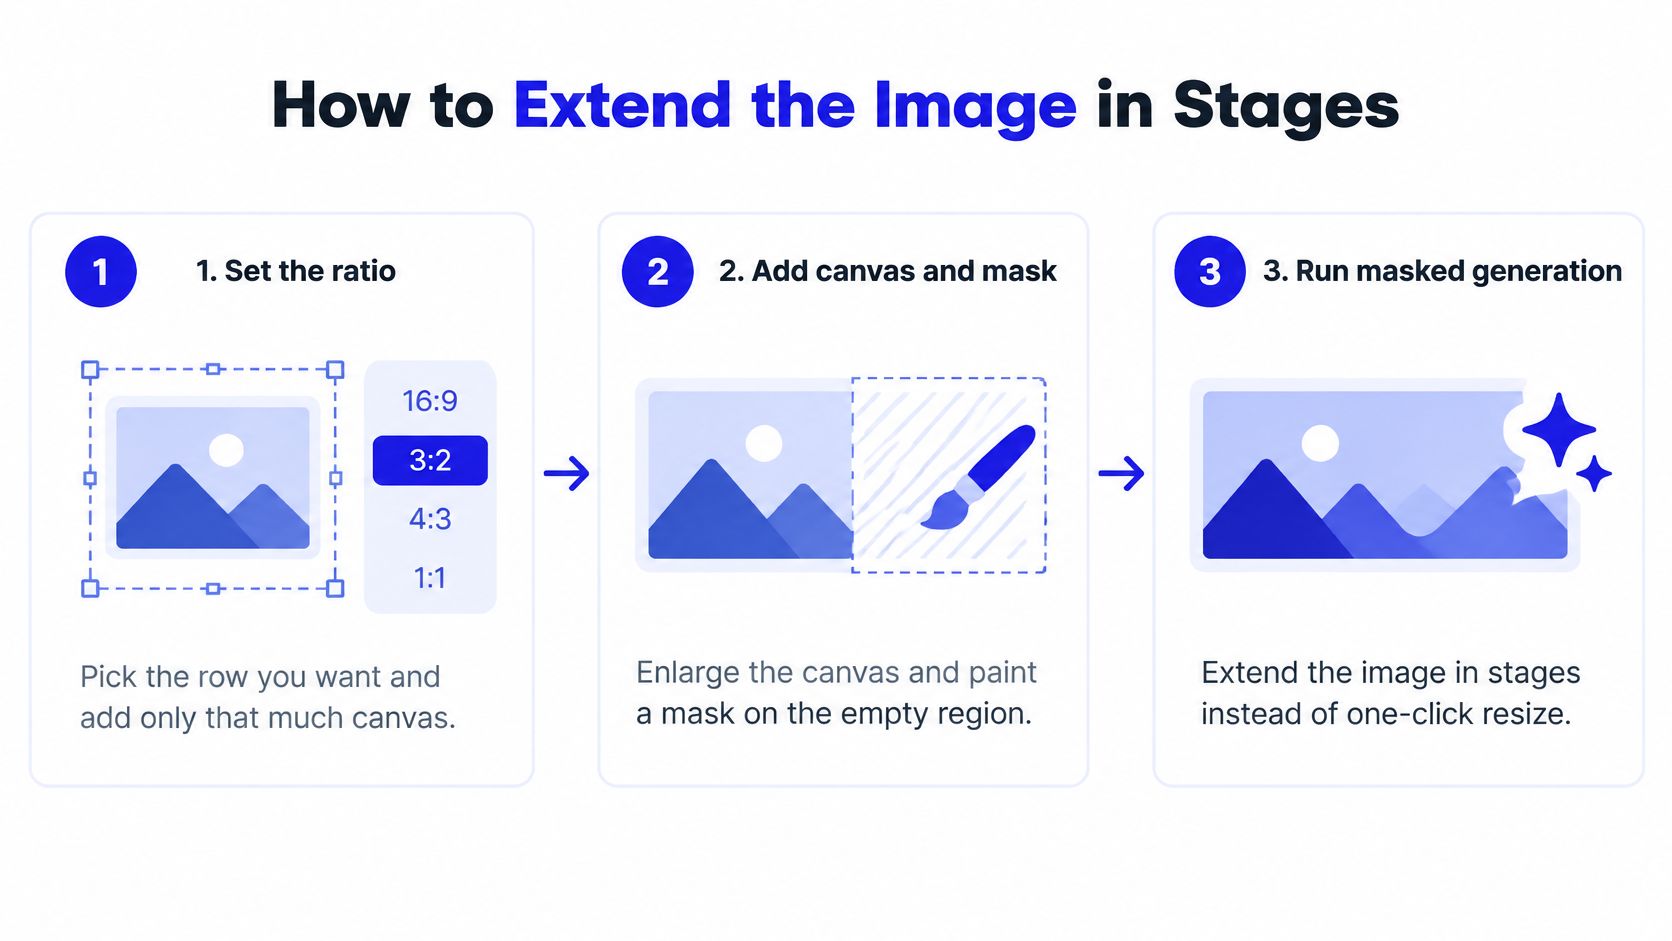
Run extension as masked generation, not a one-click resize. The mask defines where invention is allowed; the photograph supplies the fixed context.
The Webiano outpainting guide describes this as masked conditional generation, with known image information reintroduced during diffusion to help maintain continuity. It recommends smaller extensions for difficult structures, feathered overlap for blending, and boundary inspection at 100% scale.
The essential sequence is simple:
Make the mask before writing the prompt
Set the target ratio. Use the placement you've chosen, then position the original image within it. Add only the canvas the composition needs. Unnecessary empty space gives the model more scenery to invent and gives you more to inspect.
Mask the missing area. Keep the product, cap, label, and contact shadow outside the editable region. Say you're adapting a square skincare packshot into a vertical frame: the bottle remains an unmasked island, while the surrounding counter and wall become the extension area. Confirm your editor's mask convention before generating, because some interfaces display protected and editable regions differently.
Mark the scene structure. Identify the counter plane, wall boundary, shelf edges, and any person before asking for new content. If the tool supports layout guidance, use it. Write the prompt around continuation rather than asking it to create another product.
A useful prompt is:
Continue the existing pale stone countertop and warm off-white wall into the masked area. Maintain the original camera angle, surface texture, and soft window light. The product is already present. Add no bottles, packaging, plants, text, or decorative props.
This wording gives the extension a limited job. It doesn't promise exact preservation, so don't use a prompt as a substitute for a protected layer.
Expand carefully and finish once
Generate in smaller stages. Detailed architecture, people, and converging lines need more restraint than a plain wall. Extend the simpler side first and save a clean intermediate result before attempting the harder border. If the next pass fails, return to that checkpoint instead of building on damaged geometry.
Feather the background overlap. A narrow transition band lets the editor blend texture and light across the join. Keep that band away from the label and product silhouette. A soft mask that reaches onto the bottle can invite subtle changes you won't notice in a thumbnail.
Inspect boundaries and harmonize. Check the outer join and any internal tile boundaries, then reconcile background color, grain, and sharpness. Apply adjustments through background masks where possible. A global color grade may hide a seam while also changing the product color.
Save the original, the editable mask, and the accepted extension separately. Don't flatten away the evidence you'll need for review.
Stop on a duplicate object, altered word, or bent shelf edge. Give the tool a smaller, clearer task rather than adding increasingly forceful instructions to the same failed generation.
Fix Seams Scale and Broken Perspective
A bad extension doesn't always need a new source photograph. It often needs a more constrained repair. Diagnose the visible failure before changing the prompt, because a color mismatch and a broken vanishing line are different problems.
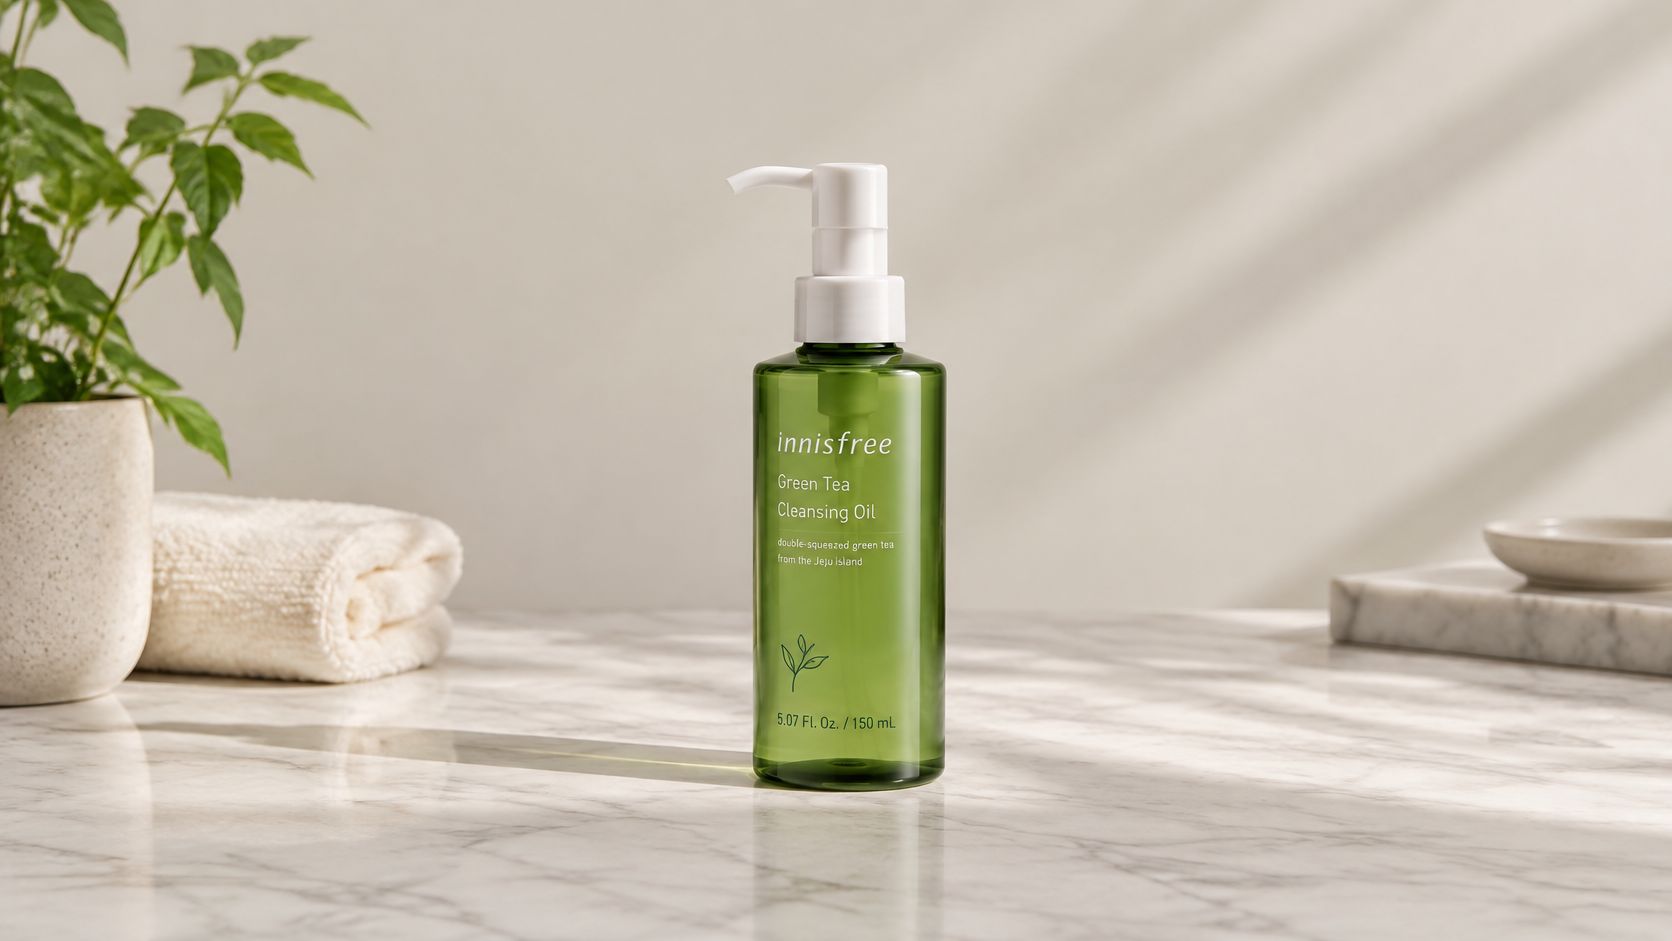
This product scene is useful for checking several kinds of continuity: the countertop plane, upright bottle, and background objects all create relationships an extension must respect.
Match each failure to a specific repair
| Visible failure | Repair to try |
|---|---|
| Another bottle appears near the border | Remove product-generation language and describe only the surrounding surfaces |
| Added wall looks warmer or cooler | Return to the last clean version and regenerate a smaller band under the existing light |
| A cropped person develops distorted limbs | Protect the complete visible figure and extend the empty side instead |
| Shelf or grout lines change direction | Supply structural guidance and rebuild the affected area in smaller passes |
| Texture changes abruptly at a patch edge | Repair that boundary locally, then harmonize background grain |
| Props make the product look miniature | Remove the invented scale reference rather than resizing the product |
These repairs address likely causes, not guaranteed diagnoses. A duplicate bottle can also come from an overly broad mask or a model's tendency to repeat prominent objects. Check the editable region before blaming the wording.
For people, composition changes can become identity or anatomy edits. Use a separate workflow for adding a person to a photo rather than asking an extension pass to complete a complex human interaction at the edge.
Give geometry more authority than prose
Mark object regions and scene structure before retrying. In the semantic-layout outpainting paper, the proposed method scored FID 8.26 and 27.67 at 25% and 50% canvas expansion, compared with Boundless at 12.82 and 38.51, NS-Outpainting at 14.42 and 42.29, and segmentation-concatenation at 10.11 and 35.18.
Lower FID indicates closer distributional similarity to the reference set. The practical implication isn't that your editor will reproduce those scores. It's that explicit layout guidance deserves priority over a longer descriptive prompt.
Don't use PSNR or SSIM as the sole acceptance test for a creative completion. A valid background can differ from a reference photograph without being wrong, while an attractive extension can still contain an unreadable label.
Judge the geometry with straight edges and the product with the source photograph. Neither a pleasing thumbnail nor a benchmark score can approve the ad for you.
Check the Product Before You Publish
Put the source photograph over the extended version at reduced opacity and align the product. Toggle the source layer while checking the cap, silhouette, label, and base. This exposes subtle regeneration that a side-by-side thumbnail can hide.
For a skincare packshot, start with the bottle rather than the styling. If the cap changes shape or the label shifts, the background's quality is irrelevant. The frame fails.
Pass or fail checks for an extended product image
| Check | Pass | Fail |
|---|---|---|
| Product region | Original pixels unchanged | Cap, label, or body regenerated |
| Scale | Same relative size as the source | New room makes the item look larger or smaller |
| Text and logo | Sharp and readable | Melted letters or a warped mark |
| Color and material | Matches the source at 100 percent | New sheen, hue, or texture |
| Shadow | One light direction | A second shadow or floating product |
| Claims | No new result implied | Scene suggests a benefit the item doesn't have |
| Background test | Neutral and branded versions stay honest | Only the styled set changes the offer |
Use the comparison at 100% zoom as part of the product-preservation workflow described by Caimera's consumer imagery analysis, which reports that a 2026 survey of 502 U.S. shoppers found 85% couldn't reliably identify AI-generated product images, while 79% preferred trusting a brand that disclosed AI use. Viewers' inability to spot generation isn't permission to publish a misleading frame.
Read the setting as part of the offer
Work down the table with the same bottle. Does the added room make it seem unusually large? Does a new reflection suggest glass when the container is plastic? Does a wet surface imply water resistance that the product doesn't have?
Check relative scale, not just pixel dimensions. The bottle can remain exactly the same size in the file while an invented sink, tile, or hand changes its perceived size.
Make a neutral-background version and a branded version from the same subject. If only the styled version makes the item appear more substantial, luxurious, or capable, separate that creative treatment from the primary shop photograph. A different atmosphere is acceptable; a different product proposition isn't.
Display Guru's guide to consistent product shots for online stores is a useful companion for establishing a repeatable source-photo setup. Consistent lighting and camera position make generated variations easier to compare against a stable baseline.
Reject locally before rebuilding globally
If the background is the only problem, preserve the approved product and replace the environment. A controlled AI background removal workflow can help separate the subject, but check the extraction around transparent packaging, reflective edges, and fine details.
Use a simple review status:
- Pass: The item and surrounding context remain faithful to what's sold.
- Repair: A localized background problem can be corrected without editing the product.
- Hold: The scene changes the implied claim or the source lacks enough detail to verify accuracy.
Decorative social crops can tolerate more invention around the subject than a shop image. They still shouldn't introduce competing products or imply a result you can't support. Record meaningful synthetic changes before the asset leaves the working folder.
Publish the Still then Test the Clip
Approve the still before adding motion. Animation introduces another opportunity for label drift, changing proportions, and invented behavior. A visually stable opening frame doesn't guarantee a truthful ending frame.
Keep an edit record that explains the change
For decorative expansion, retain a project note describing the edit and assess whether audience-facing disclosure is needed for the context. When generated surroundings materially change the setting or interpretation, use a specific description such as AI-extended background, not a badge that leaves viewers guessing.
Keep the original file, added region, model name, accepted output, and a note about whether the edit changes meaning. Disclosure doesn't fix a false implication; reject that image instead.
A study discussed in Rewarx's imagery compliance guide, involving 1,354 participants, found that labels reduced belief in false claims supported by AI images but also produced overreliance, including greater skepticism toward true claims with labeled AI images and greater acceptance of false claims with human-made images. Describe the edit accurately rather than treating a label as a universal trust solution.
Test motion from the approved frame
Make a concise, single-action cut for the shorter placement and a separate explanation-led cut where more time is useful. Open on the product or problem, demonstrate a visible action, and leave the closing beat for branding or a call to action. Build horizontal delivery as its own composition.
At ImagesArt AI, we create videos and images from text or photos, with Seedance, Kling, Veo, and more available in one place. Image to Video animates a photograph; Start & End Frame to Video uses supplied beginning and ending images; Reference to Video accepts up to seven images for visual guidance, not guaranteed identity preservation. All plans include access to all AI video and image tools; new accounts receive 15 free credits without a card, free video output is 480p, higher resolutions require an eligible paid plan, and the generation button displays the credit cost before submission.
Use the photo animation workflow to plan restrained motion. A gentle camera move is easier to review than a rotating bottle that exposes packaging never photographed. Only use source-to-extension transitions when both endpoints are approved and the intermediate transformation remains honest.
Before delivery:
- Inspect the full clip: Pause during motion, not just at the opening and closing frames.
- Check the export: Confirm resolution, duration, file size, and placement compatibility.
- Review the destination: For marketplace delivery, use Online Brand Growth's listing video guide to plan the listing workflow separately from social publishing.
Export the appropriate MP4 and review the uploaded preview. A clean render proves neither product accuracy nor likely campaign performance.
ImagesArt AI offers image editing and text- or photo-based video generation in one workspace, so you can prepare an extended still and test motion from the frame you've approved. Visit ImagesArt AI with your source packshot, choose the destination canvas, and keep the product acceptance sheet beside you before generating the clip.